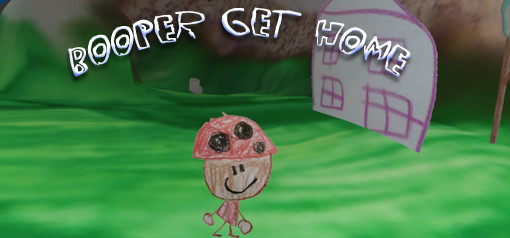
Its been a bit of a back and forth struggle: stick to platformer conventions and allow player ‘death’ or allow for other setback mechanics, such as knockback, or having the player be sent back to the beginning.
The missus feels death is out, other testers think its a needed part of gameplay – I’m still on the fence. I do believe that in order to be open to all option, I ought to at least try and add the functionality – in case it will be added in the future. Or if I decide to make it an option to choose at startup. So, here is my 1st iteration: done in Spriter Pro as an animation…
Its crude, in its current state – but it does demonstrate the viability of the concept. I’d like to add headset fade and have the player reset to a previous point. I’m not certain about how feasible it is, but one of the fellas over at the VRTK Slack suggested having him fall apart physics style. Just not sure how to implement it – my one attempt simply added rigidbody to each of the pieces, but it did nothing to affect the character when the ‘death’ trigger was activated.
Oh well – let me decide IF it will be added before getting all into the details…
Another game element I added was attaching a spot light to the Camera Rig for the dark castle interiors. Since its parented to the HMD, its dependent on the player looking around to illuminate the way – will try and make it so dark that the player will have to divide attention from where the player is, to where the player will need to be:
Into The Medium
Since I got the Oculus Rift as a developer, I’ve been trying to get it to work – a big issues was my mobo and its USB 3 ports – seems others have had the same issues and I ended up purchasing a Inateck add on card from Amazon that did the trick. I now have 2 HMDs, 4 controllers, 2 lighthouses mounted on the walls and 2 Rift sensors all cluttering my desk. Combined with my ’86 IBM Model M keyboard, it looks very cyberpunkish.
A bonus with the Rift was the freebies, and an even bigger bonus was the free software with the Touch controllers. Medium drew my attention first, since I’ve been struggling with Tilt Brush and adding my creations to Unity. As soon as I fired it up – I fell in love. I have been dreaming of a Sculptris styled sculpting program (I’ve been aching for the update to export .obj for Masterpiece VR) and seeing that Medium can export .fbx or .obj had me drooling at the prospect of sculpting game levels in VR (or even better, having my 6 year old muse create them) so after tinkering around for about 20 minutes, I had something I thought I would try to export to Unity:
I had zero problems exporting or importing and can honestly say it took less than 5 minutes of resizing and rotating to get the level in, put into place and colored and added a mesh collider so I wouldn’t fall through it – and took a walk around my new creation:
(I did also discover that some of my tinkering with the animations now has his face flying off when he jumps)
Truth be told – I’m in love with Oculus Medium – its well polished, handles like a dream and I’m looking to import kiddo drawings and see if I can take them and sculpt them out as more 3D objects.


